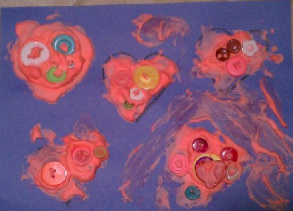
Sweet Girl liked pushing the buttons into the mixture.
| 
Love Bug dabbed a little of the mixture at a time.
|
I've been wanting to do this puffy paint recipe for some time with the girls. The first time I heard of this shaving cream and glue mixture was at the library during story time. The children used it to create pictures of clouds. I had envisioned doing snowmen with it, but since Valentine's Day is this week, I thought we'd try hearts instead.
This project can be as messy as you want it to be. The girls used spoons and paint brushes, but ended up finger painting with the mixture by the end! Be careful with how much food coloring you use though, because the girls' hands were still a tint red after we washed them. The mixture wiped up very easily from the table though.
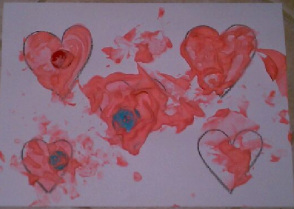
The pictures were taken while the mixture was still wet. The color lightens up and puffs some as it dries.
This project can be as messy as you want it to be. The girls used spoons and paint brushes, but ended up finger painting with the mixture by the end! Be careful with how much food coloring you use though, because the girls' hands were still a tint red after we washed them. The mixture wiped up very easily from the table though.
The pictures were taken while the mixture was still wet. The color lightens up and puffs some as it dries.
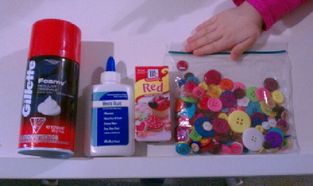
Very simple supplies!
Puffy Paint Recipe
Supplies needed: Shaving cream (not the gel kind), Elmer's-type of school glue, red food coloring, container for mixing, small bowls, spoons, paintbrushes, crayons, construction paper, buttons and Valentine foam embellishments
Supplies needed: Shaving cream (not the gel kind), Elmer's-type of school glue, red food coloring, container for mixing, small bowls, spoons, paintbrushes, crayons, construction paper, buttons and Valentine foam embellishments
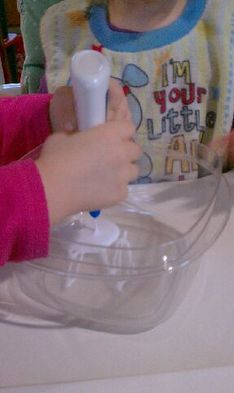
Sweet Girl squeezing the glue.
What to do:
- Squeeze desired amount of glue into container.
- Add food coloring to the glue and mix, adding more food coloring until desired color is reached.
- Add equal parts of shaving cream. If you want a stiffer mixture, use more glue.
- Fold in the shaving cream until it is incorporated.
- Draw hearts on a piece of construction paper.
- Use spoons, paintbrush, etc to dab mixture to fill in the hearts.
- Add buttons and/or foam embellishments.
- Let picture dry flat overnight.
- Display picture as is or cut around hearts and attach to Valentine cards or make them into magnets.
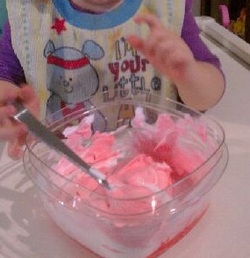
Love Bug mixing in the shaving cream.
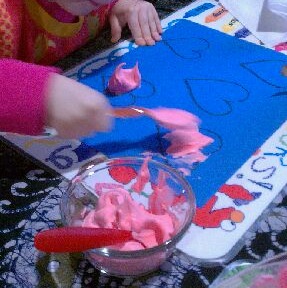
Sweet Girl filling in a heart.
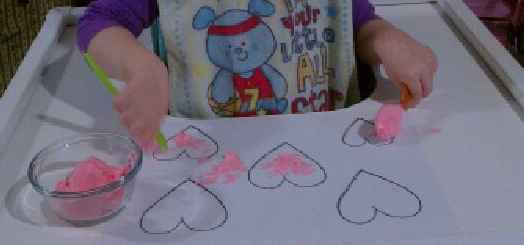
Love Bug went at it with two hands.
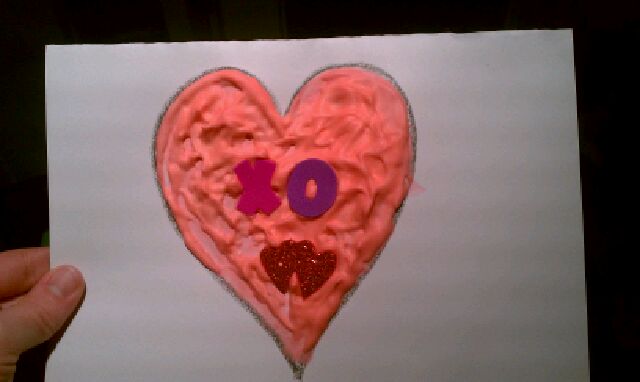
My creation for the front of a card.
| 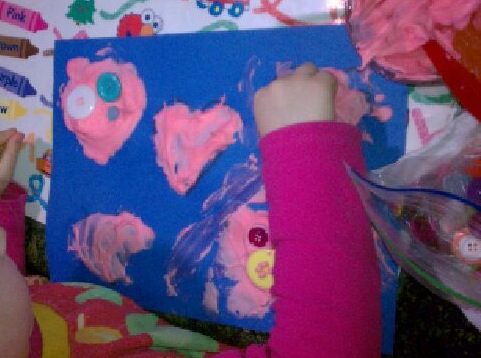
Sweet Girl adding buttons.
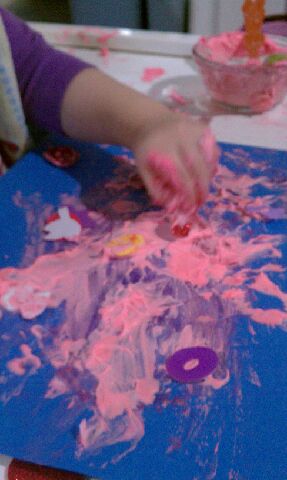
Then, things got a bit messy. (Love Bug)
|

Sweet Girl tells me Elmer is in this picture somewhere. :)
Afterthoughts:
I definitely see us doing this again. Maybe next time we'll make more than one color and use different utensils to make some neat artwork to display.
- Make sure to explain that this is NOT edible. With the spoons and bowls, it very much looked like we were making pudding. I had to keep a VERY close eye on Love Bug because she tried to taste the mixture several times. I tried offering her a paintbrush and reminding her it was "glue paint," but she preferred dabbing with the spoon.
- Add the food coloring to the glue and not the shaving cream because too much mixing will "deflate" the shaving cream.
- Have a damp cloth on hand to wipe messy fingers.
- Using two spoons made it easier to apply the mixture.
- You could use forks, q-tips, etc to apply the mixture for a different look.
- Pick a shaving cream with a smell you like because it will linger.
- Take the shaving cream to bath time for some extra fun!
I definitely see us doing this again. Maybe next time we'll make more than one color and use different utensils to make some neat artwork to display.
**All photos and text are property of Angela Pounders and can not be distributed without permission.
If you share one of my posts, please include a link to my page. Thanks!
 RSS Feed